Address
304 North Cardinal
St. Dorchester Center, MA 02124
Work Hours
Monday to Friday: 7AM - 7PM
Weekend: 10AM - 5PM
Address
304 North Cardinal
St. Dorchester Center, MA 02124
Work Hours
Monday to Friday: 7AM - 7PM
Weekend: 10AM - 5PM
Learn how to winterize an above-ground pool pump, hoses, skimmer, return, and filter without trapping water that can freeze and crack equipment.
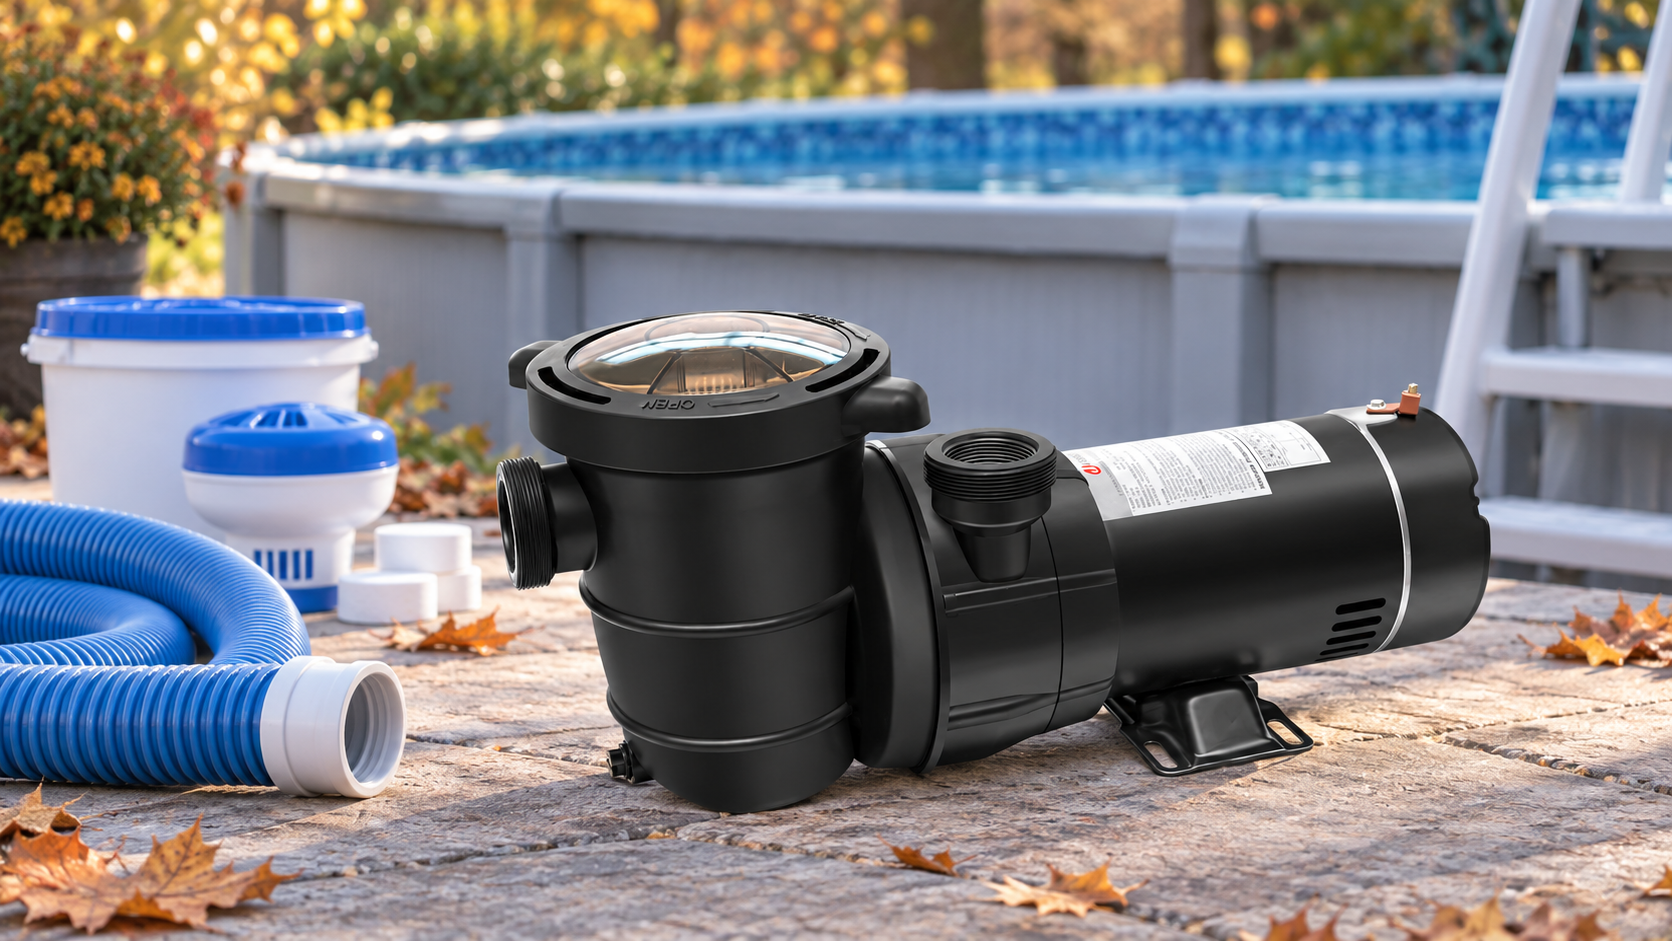
Illustrative winterizing setup featuring a PUREBY above-ground pool pump. Always follow the manual for the exact pump, filter, pool, and winter cover.
To winterize an above-ground pool pump, hoses, and skimmer, shut off the electrical supply, stop water from reaching the equipment, release system pressure, disconnect and drain the hoses, drain the pump and filter completely, and protect the skimmer and return using the method approved for your pool and cover. Store removable equipment in a dry, freeze-protected location when the manufacturer permits it.
The goal is not simply to turn the pump off. The goal is to prevent water from remaining trapped in any housing, hose, fitting, valve, or skimmer body where freezing expansion could crack the part.
Quick answer: Clean and balance the pool first. Then disconnect power, isolate the pool openings, relieve filter pressure, remove and drain the hoses, open the pump and filter drains, and winterize the skimmer and return. Do not fully drain a permanent or semi-permanent above-ground pool unless its manufacturer requires it; portable seasonal pools may have different draining and storage instructions. Never use automotive antifreeze or high-pressure compressed air. Always follow the manuals for the exact pool, pump, filter, and winter cover.
A safe closing sequence moves from water preparation to hydraulic isolation, drainage, component protection, and final documentation.
| Stage | What to do | Why it matters |
|---|---|---|
| Pre-check | Identify the pool and equipment type | Permanent steel-wall pools and portable soft-sided pools may have different storage requirements |
| Step 1 | Clean and balance the water | Reduces staining, scale, algae, and spring cleanup |
| Step 2 | Choose the approved skimmer and return method | Determines whether the water must be lowered or the openings can be sealed |
| Step 3 | Disconnect power and release pressure | Prevents accidental startup, electrical hazards, and pressurized opening of equipment |
| Step 4 | Disconnect, drain, dry, and label hoses | Prevents trapped water from freezing inside low spots and fittings |
| Step 5 | Drain and protect the pump | Protects the strainer housing, volute, lid, and drain ports |
| Step 6 | Winterize the filter | Sand, cartridge, and DE filters require different procedures |
| Step 7 | Protect the skimmer and return | Keeps freeze expansion from cracking the skimmer body or connected fittings |
| Step 8 | Inspect wear parts | Finds damage before it becomes a spring startup leak or electrical problem |
| Step 9 | Label and store removed parts | Makes spring reassembly safer and faster |
This is a planning guide, not a replacement for product manuals. If your system includes a heater, saltwater chlorine generator, hard plumbing, buried lines, or unfamiliar electrical work, the closing procedure may require a qualified pool professional.
Before winterizing equipment, determine whether the pool is designed to remain assembled through freezing weather or must be drained, dried, and stored.
“Above-ground pool” can describe several very different systems:
| Pool type | Typical winter approach |
|---|---|
| Permanent or semi-permanent steel-wall pool | Usually remains assembled and partly filled; winterize the equipment, skimmer, return, and cover system |
| Rigid-frame pool | Check the exact model; some may remain assembled, while others require seasonal disassembly |
| Soft-sided, inflatable-ring, or seasonal pool | Often drained, cleaned, dried, disassembled, and stored when required by the manufacturer |
The pool manual controls. These are categories, not universal instructions.
Do not assume that a technique shown for a steel-wall pool is safe for a portable vinyl pool. Start with the pool manual, then check the separate manuals for the pump, filter, sanitizer, and cover. Intex, for example, directs owners to model-specific support materials because procedures and replacement parts vary by pool and filtration system.
If the manual requires seasonal disassembly, follow that instruction instead of leaving the pool outdoors under a generic winter cover.
Gather the correct plugs, tools, storage containers, and safety equipment before shutting down circulation.
A typical above-ground closing kit may include:
Do not improvise a plug that can come loose or damage a fitting. Match winterizing parts by thread, diameter, and the pool manufacturer’s instructions.
Winterize only after the water is clean, the chemistry has been tested, and any closing products have been used exactly as their labels direct.
Remove leaves and debris, brush the walls and floor, vacuum as needed, and clean the waterline. Address visible algae before covering the pool. Closing dirty water seals organic material under the cover and can make spring cleanup much harder.
Test the water and follow the pool-surface manufacturer’s limits for pH, alkalinity, sanitizer, calcium hardness, and any other relevant parameters. There is no single chemical recipe for every liner, sanitizer, climate, or closing kit.
Pentair’s winterizing guidance recommends balancing the water before closing to reduce the risk of algae, scale, and other problems. If a chemical label requires circulation after application, complete that circulation period before disconnecting the pump.
When handling or storing pool chemicals, follow the label and keep each product in its original labeled container. The CDC’s pool chemical safety guidance advises keeping chemicals dry, separated from incompatible products, protected from heat and direct sunlight, and secured away from children and animals. Never mix different pool chemicals together.
Not sure whether it is time to close? Use PUREBY’s U.S. climate-zone guide to pool closing to compare seasonal timing with your local freeze risk.
The correct water level depends on the pool design, winter cover, and whether approved skimmer and return sealing devices are used.
Two common approaches are used for above-ground pools:
Some manufacturers and cover systems direct owners to lower the water enough that it cannot enter the skimmer or return fitting. Once the openings are above the waterline, the hoses can be removed and the equipment can drain without continuous water flow from the pool.
Do not lower the level farther than the pool or cover manufacturer allows. The water supports the liner and pool wall, and unnecessary draining can create other structural or liner problems.
Some systems use a winter skimmer plate, plug, or threaded expansion device to isolate the skimmer and return without lowering the water below them. This method is acceptable only when the devices are designed for the exact opening and installed according to their instructions.
Pentair notes that pool professionals commonly use a skimmer device or plug to help prevent water from becoming trapped in the skimmer plumbing. The important principle is that the chosen method must keep water out of vulnerable spaces and allow for expected freeze expansion.
Do not combine methods by guesswork. A cover may require a particular water level, and a skimmer plate may rely on the water remaining at a particular height. Follow the pool and cover instructions as a system.
Turn off the pump and any automatic controls, disconnect the approved electrical supply, and release all filter pressure before opening the system.
For a cord-and-plug pump, switch the unit off and unplug it from the GFCI-protected outlet using the manufacturer’s shutdown procedure. Keep the cord and plug dry. For hardwired equipment, unfamiliar controls, or damaged wiring, use a qualified electrician or pool professional.
If the system has an automatic chemical feeder, saltwater system, heater, or timer, follow each manufacturer’s shutdown sequence. CDC guidance for aquatic facilities advises shutting down both chemical-feed and recirculation systems before servicing either system. For a residential pool, follow the shutdown procedure specified by the manufacturer of the feeder, salt system, heater, and pump.
Proceed in this order:
Never move a multiport valve handle while the pump is running. Never loosen a filter clamp or pump lid while the system is pressurized.
Every suction and return hose should be disconnected, emptied, dried, inspected, and stored so water cannot collect in a low spot and freeze.
Above-ground pool hoses can appear empty while still holding water in corrugations, elbows, valves, or adapters. Work from the highest end toward the lowest end and rotate the hose as it drains.
Use this sequence:
Avoid sharp folds that can crease a cold hose. Store clamps, adapters, and seals with their matching hose or in clearly labeled bags.
If the equipment is connected with rigid plumbing instead of removable hoses, the system may need a different drain or blowout procedure. That is a good point to call a professional rather than forcing air through an unfamiliar layout.
A winterized pump must be electrically isolated, depressurized, emptied through every manufacturer-provided drain, cleaned, and kept dry.
After the hoses are disconnected:
If the pump remains outside, follow its manual for weather protection. Protect it from precipitation while maintaining ventilation. Pentair’s Clean & Clear above-ground manual specifically warns against wrapping the pump motor in plastic because trapped condensation can promote corrosion.
Do not reinstall drain plugs merely to make the pump look complete unless the manual says to do so. Many owners store plugs in the pump basket or a labeled spring-startup bag so the ports remain visibly open during storage. The exact practice should follow the pump manual.
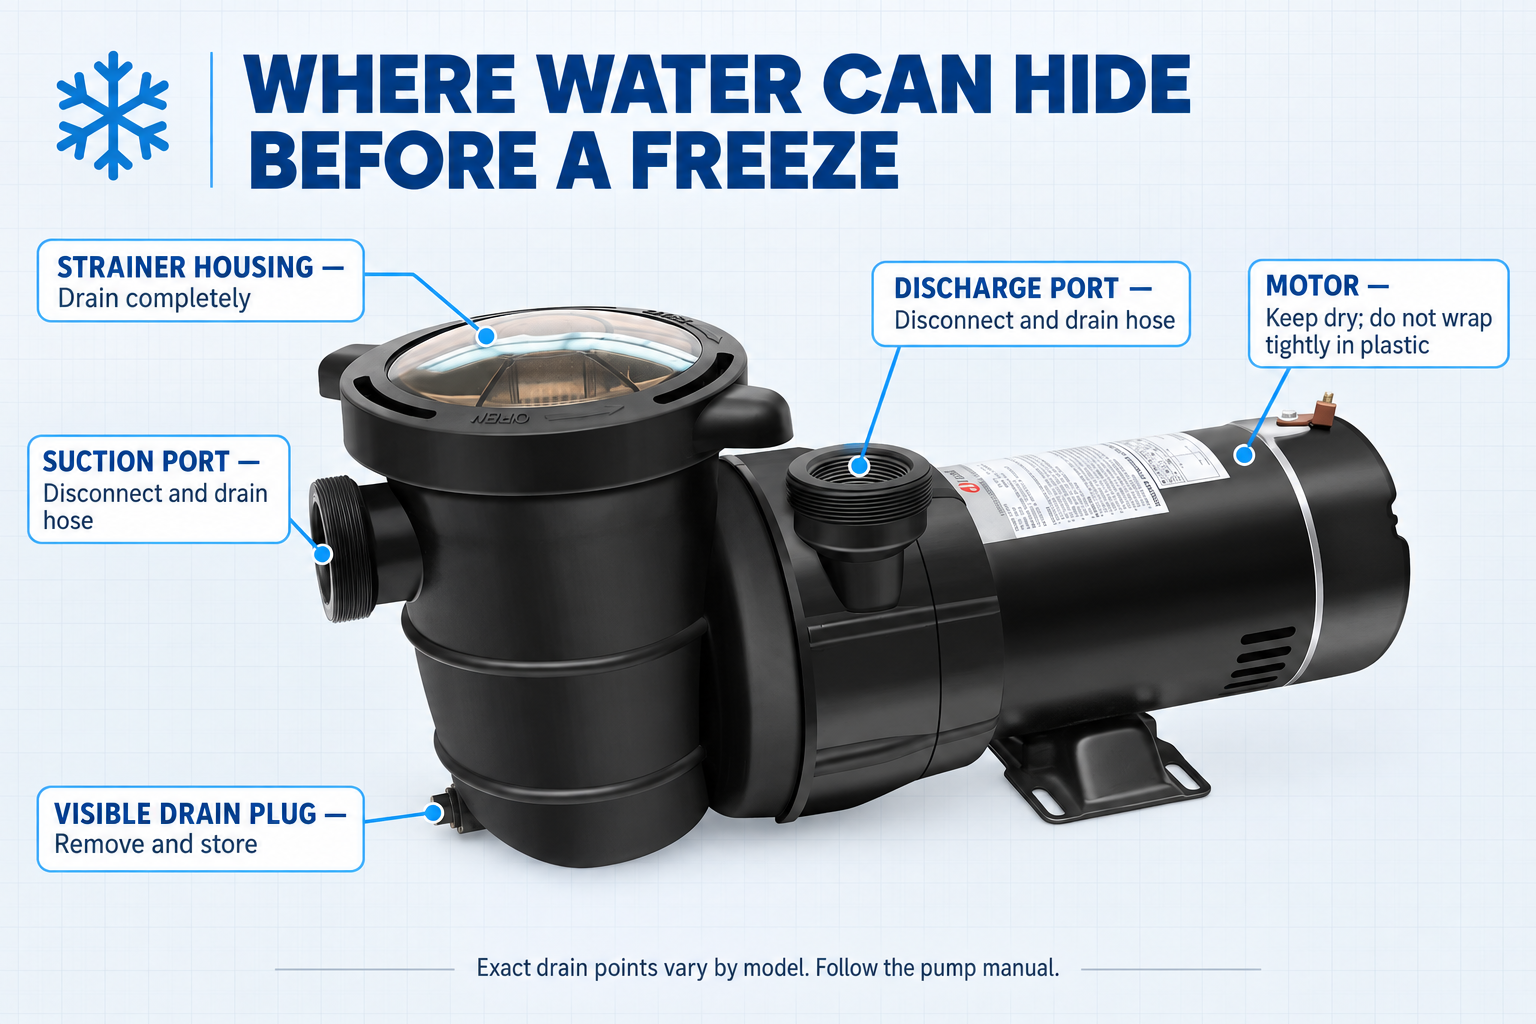
PUREBY product reference: the graphic uses a real PUREBY above-ground pump photo and labels only the structures visible in this view. Exact drain locations and quantities vary by model; use the manual to identify every manufacturer-provided drain before winter storage.
For a basic above-ground setup with removable hoses, disconnecting and gravity-draining the components is often simpler than blowing lines. If the manual or a professional procedure calls for air purging, use only the specified equipment and pressure.
Compressed-air requirements are model-specific. Pentair’s PLM Series manual permits air purging only with a low-pressure, high-volume blower below 5 psi. Other equipment may specify a different procedure or prohibit air purging. Never assume a pressure limit from another model—follow the manual for the exact pump, filter, and plumbing system. Never substitute a high-pressure shop compressor, and never stand over a pressurized filter or closed plumbing section.
The filter must be cleaned as required, depressurized, drained through all intended ports, and left in the storage position specified for that filter type.
Follow the filter manual rather than assuming all multiport valves work the same way. A common sequence is:
Pentair’s Cristal-Flo II above-ground system manual directs owners in freezing climates to backwash, shut the pump off, open the air bleeder, place the valve in “Winterize,” remove the filter drain cap, and drain the pump housing and piping.
Do not empty the sand from the tank unless the filter manufacturer specifically requires it.
A common cartridge-filter sequence is:
Pentair’s Clean & Clear above-ground manual directs owners to open the manual air relief, remove the filter drain cap, remove the pump drain plugs, and drain the piping. It also states not to wrap the pump motor in plastic.
Follow the exact DE filter manual for cleaning, draining, element handling, and disposal of used media. Avoid breathing dry DE dust and follow local requirements for disposal. If you have not serviced a DE filter before, use a qualified professional.
The skimmer and return are protected only when pool water, rain, and snowmelt cannot remain trapped where freezing expansion can crack the fittings.
Depending on the approved method:
A threaded skimmer winterizing device is designed to seal the line and, on some products, provide a crushable space for ice expansion. It is not a substitute for the correct water level, cover, or installation instructions.
Do not overtighten plastic plugs or fittings. Cold plastic can be brittle, and excessive force can damage threads or distort the wall fitting.
Winter closing is the best time to find seals, hoses, baskets, and fittings that are already near the end of their service life.
PUREBY recommends documenting the following inspection points before storage:
| Part | What to look for | Why it matters next spring |
|---|---|---|
| Pump lid O-ring | Flat spots, cracking, stretching, cuts, or a sticky surface | A damaged seal can cause an air leak and loss of prime |
| Pump lid | Cracks, cloudy stress marks, damaged threads, or distortion | The lid must seal correctly under operation |
| Drain plugs and gaskets | Missing plugs, flattened seals, damaged threads | A poor seal can leak when the system is restarted |
| Pump basket | Cracks, warping, or missing handle sections | A damaged basket may allow debris toward the impeller |
| Hoses and cuffs | Splits, hardening, abrasion, pinholes, or loose cuffs | Suction-side damage can admit air; return-side damage can leak water |
| Hose clamps and unions | Corrosion, stripped screws, cracking, or worn gaskets | Weak connections can leak or separate |
| Skimmer and return fittings | Wall movement, cracks, brittle plastic, or damaged gaskets | Freeze stress can turn a small defect into a larger leak |
| Power cord and plug | Cuts, heat discoloration, bent blades, or damaged GFCI components | Electrical damage requires professional evaluation before reuse |
Take close photos of the pump label, hose routing, valves, and fittings before disassembly. If replacement is needed, match by model, voltage, connection size, dimensions, and hydraulic requirements—not appearance alone.
For help confirming pump compatibility, review How to Choose the Right Pool Pump: Size, GPM, TDH, HP & Voltage before ordering a replacement.
Dry, label, and store every removable component in a way that prevents corrosion, freeze damage, chemical exposure, and spring reassembly mistakes.
Removable pumps and hoses are generally better protected in a dry, ventilated, freeze-protected location when the manufacturer allows indoor storage.
Before storage:
Do not use the pool-chemical storage area as general equipment storage. Keep the pump and electrical parts in a separate dry location, and always keep chemicals away from heat, flame, and fuel-powered equipment.
Use one sealable parts container or divided organizer and label it with the pool model and closing date. Include:
Do not place damp parts in a sealed bag. Dry them first, and keep O-rings away from sharp hardware.
Drainage is the first choice where the equipment is designed to drain. Use antifreeze only where the exact equipment or plumbing procedure specifically allows an approved non-toxic propylene-glycol product.
Automotive antifreeze is toxic and is not suitable for pool equipment. Some pool-equipment manuals allow non-toxic propylene glycol in areas that cannot be completely drained, while other systems can and should be protected by drainage and removal alone.
If an approved non-toxic propylene-glycol pool/RV antifreeze is specifically permitted for the piping:
Never pour an unspecified antifreeze into the pool water as a shortcut.
Most freeze damage comes from trapped water, an incorrect water-level strategy, unsafe pressure, or overlooked small fittings.
| Mistake | Why it is risky | Better approach |
|---|---|---|
| Turning the pump off but leaving it full of water | Water can freeze inside the housing or volute | Remove every specified drain plug and verify complete drainage |
| Leaving connected hoses sagging on the ground | Low spots retain water | Disconnect, rotate, drain, dry, and store the hoses |
| Fully draining a permanent or semi-permanent pool without instructions to do so | Can damage a liner or reduce support for the walls | Follow the exact pool and cover instructions; portable seasonal pools may require complete draining and storage |
| Assuming every pool must be lowered below the skimmer | Some systems use winter plates or plugs and require a different water level | Follow the coordinated pool, skimmer, and cover instructions |
| Using a high-pressure air compressor | Can separate components and cause severe injury | Use only an approved low-pressure, high-volume method or hire a professional |
| Using automotive antifreeze | Toxic and potentially damaging to equipment | Use only an approved propylene-glycol product when the manual calls for it |
| Wrapping the pump motor tightly in plastic | Traps condensation around electrical and metal parts | Keep equipment dry while allowing ventilation |
| Losing drain plugs and adapters | Delays or complicates spring startup | Store small parts in a labeled startup bag |
| Ignoring worn O-rings and hose cuffs | Existing air or water leaks return at opening | Inspect and replace by exact model and specification |
| Closing before the water is clean | Traps debris and increases spring cleanup | Clean, test, and treat the water before equipment shutdown |
Remove and store the pump indoors if the manufacturer permits it and the installation is designed for seasonal removal. If the pump must remain outside, drain it completely and protect it as the manual directs. Indoor storage does not correct water trapped in a pump that was never properly drained.
Not in a freezing climate unless the pool manufacturer provides a specific approved method. Removable hoses should normally be disconnected, drained, dried, inspected, and stored. A hose can retain water in corrugations or low spots even when the ends look empty.
It depends. Some pools and covers require the water below the skimmer and return. Others use an approved skimmer plate and return plug without the same reduction. Follow the pool, skimmer-device, and cover instructions together; do not apply one universal water level to every above-ground pool.
Usually not if it is a permanent or semi-permanent pool designed to remain assembled. The remaining water supports the liner and walls. Portable pools may have different instructions and may require full drainage and storage. Follow the exact pool manual.
The number varies by pump housing. Some pumps have one drain, while others have separate drains for the strainer pot and volute. Use the parts diagram or manual for the exact model rather than stopping after the first plug.
Do not use high-pressure compressed air. Pressurizing a closed or improperly configured system can cause components to separate and create severe injury risk. If air purging is required, follow the manual’s pressure limit and use the correct low-pressure, high-volume equipment—or hire a pool professional.
Follow the pump manual. Many seasonal procedures leave drain ports open and store the plugs in a labeled parts bag or pump basket. This helps residual moisture escape and makes the winterized state visible, but the correct method is model-specific.
The critical risk is freezing water, not a single universal closing date. Prepare before the first credible freeze forecast so there is time to clean the pool and drain the system correctly. Historical freeze timing helps with planning; your local forecast determines when the risk is immediate.
Winterizing an above-ground pool pump, hoses, and skimmer is a controlled drainage process. Prepare the water first, choose the correct water-level and opening-protection method, disconnect power, relieve pressure, remove and drain the hoses, drain every pump and filter port, and keep water out of the skimmer and return.
The most important principle is simple: if freezing weather is expected, no vulnerable component should be left with trapped water inside it. The safest way to achieve that result depends on the exact pool, pump, filter, plumbing, and winter cover—not on a one-size-fits-all checklist.
Take photos, label the small parts, inspect seals and hoses, and use a qualified professional whenever the setup includes unfamiliar pressure, electrical, heater, sanitizer, or hard-plumbing work. A careful fall closing protects the equipment and gives you a much easier start next spring.